
Anúncios
Ever deleted precious pictures and felt an immediate pang of regret, wishing you could reverse time?
In 2023, over 70% of smartphone users reported accidental photo deletions, according to PhotoTech Insights.
We will show you how recovering photos from the trash is simpler than you think, exploring both your phone’s built-in recycle bin and Google Photos’ backup features, offering easy-to-follow steps so you never permanently lose precious memories again.
Understanding The Phone’s Trash Bin
Modern smartphones, whether Android or iOS, often include a built-in trash or recycle bin that temporarily holds your deleted pictures. This feature acts as a buffer between accidental deletions and irreversible loss, giving you a window of time—typically 30 days—to bring back those cherished images. However, many users remain unaware of how their phone’s recycle bin operates, which leads to panic when they realize important photos have vanished.
When you tap “delete” in your phone’s gallery, the image doesn’t vanish immediately. Instead, it moves to a hidden folder—commonly named “Trash,” “Recently Deleted,” or “Bin.” During this grace period, you can open that folder and restore your pictures in just a few taps. The system effectively shields you from hastiness, ensuring you have a chance to correct mistakes. On iPhone, you’ll find the “Recently Deleted” album in the Photos app, while many Android phones contain a “Trash” or “Bin” section in their gallery apps. Despite minor naming differences, the concept remains the same: your phone’s trash bin is a temporary storage area.
Although the phone’s trash bin is a lifesaver, it’s essential to understand its limitations. After the designated time window, your device automatically purges the files to free up space. Additionally, if your phone’s storage is critically low, it may remove older trash items ahead of schedule. For that reason, swift action is key. If you suspect a crucial photo ended up in your phone’s trash, check immediately. By doing so, you significantly boost your odds of recovering photos from the trash before they become permanently unrecoverable. This first line of defense can rescue you from heartbreak more times than you’d imagine, and it’s surprisingly straightforward once you know where to look.
Unveiling The Google Photos Trash System
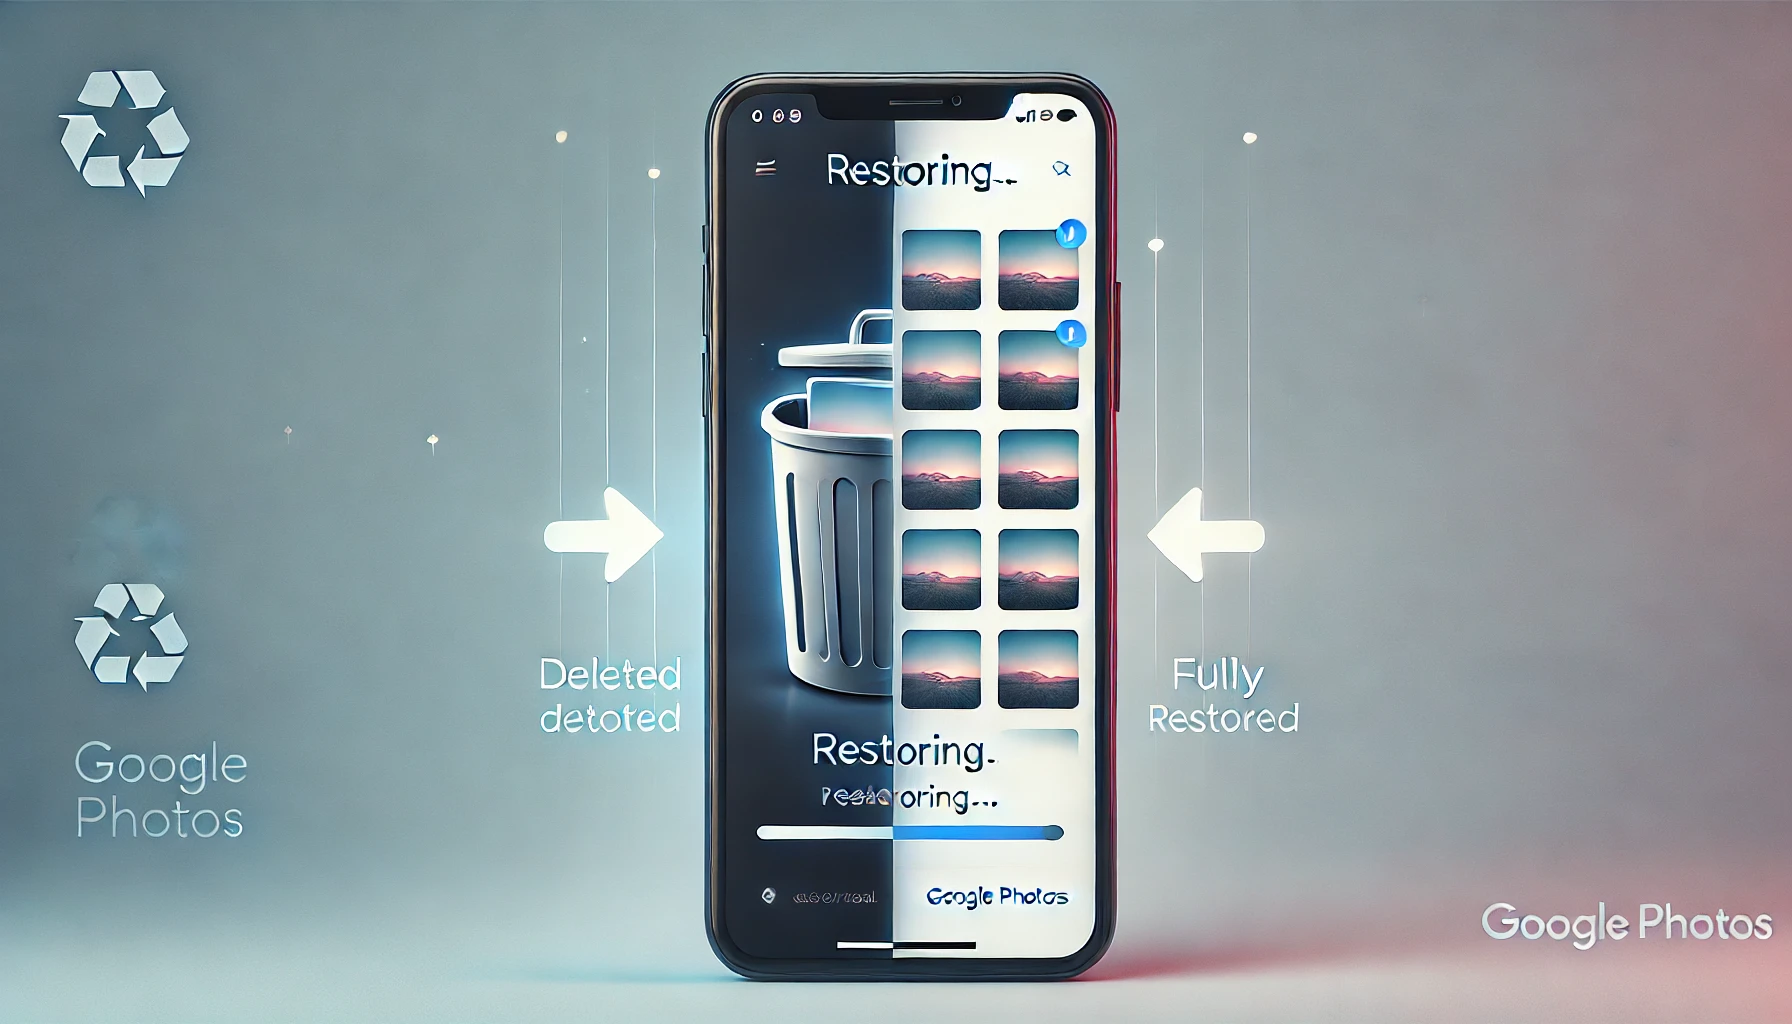
Google Photos amplifies your safety net by offering its own recycle bin—referred to as “Trash”—which stores deleted images for up to 60 days. This extended duration is beneficial for those who inadvertently remove photos from a synced phone gallery. If you’re already using Google Photos for backups, you gain an extra layer of protection. Even if you permanently delete a file from your phone’s local storage, Google Photos often retains a copy in its trash folder for a while, giving you more opportunities to restore.
Understanding Google Photos’ trash mechanism is crucial if you rely on the app for backup and organization. When you delete a photo within Google Photos, the app moves it to the Trash folder, separate from your local phone gallery. This dual-layer approach can be confusing but ultimately works in your favor. If you open the Google Photos app and tap “Library,” you’ll see a “Trash” icon. Inside, you can view the items you’ve recently removed. Should you find an important snapshot, selecting “Restore” promptly returns it to your main library, along with any accompanying data like time stamps or albums.
However, it’s important to note that images in Google Photos Trash do count toward your storage limit, and they vanish after the 60-day window. Also, if you choose to empty the Trash manually, you’ll forfeit all chances of recovery. Experts from CloudSafe Research emphasize that frequent manual “cleanups” of your Google Photos Trash heighten the risk of losing pictures for good. On the flip side, those who harness the synergy between their phone’s local recycle bin and Google Photos’ trash enjoy a formidable safety net. You essentially get two chances to rescue your media before it’s wiped off the digital map.
Key Differences Between Phone Trash And Google Photos Trash
Despite sharing a similar purpose—safeguarding your deleted images from premature erasure—the phone’s built-in trash bin and Google Photos’ trash folder operate in distinct ways. By recognizing these discrepancies, you can skillfully navigate both systems, achieving the highest success rate when recovering photos from the trash.
| Aspect | Phone’s Built-In Trash | Google Photos Trash |
|---|---|---|
| Storage Duration | Typically ~30 Days | Up to 60 Days |
| Location Of Trashed Files | Stays in local “Trash” or “Bin” folder | Stores files in Google Photos “Trash” folder |
| Automatic Deletion Trigger | Time-based or low storage triggers | Strict 60-day limit or manual emptying |
| Retrieval Method | Open gallery’s “Recently Deleted”/“Bin” -> Restore | Open Google Photos -> Library -> Trash -> Restore |
| Synced Across Devices | Usually local to one device only | Synced with Google Account, accessible on multiple devices |
| Impact On Storage | Freed if purged or after bin period | Trash items count toward Google storage cap |
| Offline Recovery | Doesn’t require internet to restore | Needs internet for final retrieval from Google servers |
• Time Frames: Most smartphone trash bins keep files for around 30 days before permanent removal. Google Photos, however, offers a more extended 60-day grace.
• Sync Vs. Local Storage: Phone trash is local; you can’t access it remotely. Meanwhile, Google Photos is cloud-based, allowing restoration even if you switch devices.
• Space Management: If your phone’s storage is running low, it might purge trash earlier. Google Photos, on the other hand, reduces your online storage allotment if the trash is full, potentially prompting some users to empty it prematurely.
Anúncios
• Redundancy: Ideally, you want both. For instance, you could rely on your local phone bin for short-term safety and let Google Photos trash handle the more extended buffer, bridging gaps if you forget to restore an item quickly.
By contrasting these two systems, you gain clarity on how best to retrieve lost photos. Each approach offers unique advantages and potential drawbacks. Using them in tandem often yields the greatest chance of success.
Practical Steps To Recover Deleted Photos On Your Phone
Recovering photos from the trash on your phone is refreshingly straightforward. Yet, under stress—like when you realize you’ve deleted your child’s birthday snapshots—knowing the correct sequence can save time and anxiety. Here’s a practical guide for both Android and iPhone users:
1. Locate The Trash/Recently Deleted Folder
• Android: Open your default Gallery app (or a custom gallery if your device manufacturer provides one). Look for “Trash,” “Recycle Bin,” or “Recently Deleted.” If you don’t see it right away, tap on menu icons or settings—some models hide it under advanced options.
• iPhone: In the Photos app, scroll down to “Albums” and find “Recently Deleted.” Apple organizes it near the bottom of the albums list.
2. Check The Time Window
• Many Android devices keep deleted files for around 30 days. iPhones typically store them for 30 days as well. If you’re past that cutoff, your phone might have purged them already, meaning you’ll need a different approach (like advanced recovery software).
3. Select And Restore
• Within the trash folder, select the photos you want. Look for a “Restore,” “Recover,” or “Put Back” option. Tapping this instantly places them back in your main gallery. On iPhone, confirm your selection by tapping “Recover” again if prompted.
• If you only see “Delete Permanently,” it may be that the phone can no longer restore them. Some devices ask for a second confirmation—be cautious not to finalize a permanent delete.
4. Verify The Restored Photos
• Return to your main gallery or camera roll to confirm the pictures are back. If they appear distorted or missing data, you might consider using a third-party recovery tool.
• If you have enabled Google Photos backup, check the Google Photos app as well. Sometimes the phone’s restoration automatically syncs them back to the cloud, ensuring an additional copy is saved.
5. Quick Tips
• Act Fast: The faster you realize your mistake, the greater your odds of a successful restoration.
• Avoid Overwriting: Refrain from taking new photos or updating apps until you’ve checked your trash. Additional writes can hamper recovery attempts.
• Use Cloud Backup: If you’re prone to accidental deletions, consider enabling Google Photos or another cloud service. Redundancy is your friend.
Adhering to these steps drastically increases your likelihood of success, turning moments of panic into quick fixes. By mastering the phone’s built-in trash system, you’re already halfway to ensuring that no valuable memory disappears forever.
Retrieving Images From Google Photos Trash
If you use Google Photos, you’ve probably noticed how convenient its backup capabilities can be for archiving and syncing images across devices. Yet many forget about the Trash folder within the app, which separately stores your deleted files for up to 60 days. Here’s how to exploit Google Photos’ trash system to retrieve images you might have thought were gone:
1. Access The Google Photos App
• Open the app on your phone. Ensure you’re logged into the correct Google account, as trash contents are linked to your account credentials. If you have multiple Google accounts, switch accordingly to find the missing pictures.
2. Navigate To The “Library” Section
• At the bottom of the screen, tap “Library.” You’ll see various folders, including “Trash.” This is your portal to any photos you recently removed within Google Photos or from a device synced to this account.
3. Explore The Trash Folder
• Inside “Trash,” scroll through the list of images. They typically display by date of deletion. Keep an eye on the countdown under each file, indicating how many days remain before it’s permanently removed.
4. Restore Or Permanently Delete
• Select the pictures you wish to retrieve and tap “Restore.” They reappear in your main Google Photos library and any synced devices, complete with captions, timestamps, and even location data, if available. If you’re sure you don’t need them, you can select “Delete Permanently,” freeing up storage but forfeiting any chance of recovery.
5. Confirm They Synced
• After restoration, check your “Photos” tab to ensure the images now appear in chronological order. If your phone’s gallery is also synced, you might see them reintroduced locally. The success or speed of this process may vary based on your internet connection.
Potential Limitations:
• If you emptied the Trash folder manually or waited longer than 60 days, Google Photos discards them for good.
• If you disabled Google Photos backup at any point, some images may never have reached the cloud.
• Storage constraints apply. If your Google storage is nearly full, you might have offloaded or compressed older images without realizing it.
Following these guidelines ensures you leverage Google’s robust backup architecture to give your pictures a second lease on life. According to a 2022 CloudSync report, Google Photos accounted for 32% of successful online image recoveries—a testament to how beneficial this step can be. Just remember: regular backups and mindful trash management maximize your retrieval success rate.
Real-Life Examples And Case Studies
1. The Busy Parent Who Deleted Family Photos
Marcia, a working mother of two, accidentally deleted 50 photos from her daughter’s recent birthday party while cleaning her phone’s gallery. Panicked, she rushed to check her phone’s trash folder. Within minutes, she found the entire set of images safe and sound, restoring them instantly. Days later, she realized some pictures were also saved in Google Photos. Even if the phone’s trash had been emptied, the images in Google Photos trash would still offer a chance for recovery. Her story highlights how synergy between phone trash and cloud backups provides an extra buffer against mishaps.
2. The Travel Vlogger Who Overlooked HEIC Compatibility
Jake, a travel vlogger using an iPhone, discovered that half his images were missing after a chaotic trip. He realized he’d absentmindedly deleted them from his phone’s gallery, emptying the local trash in the process. Fortunately, he had configured Google Photos to sync his shots in HEIC format. By opening Google Photos, he found the images safely tucked away in the “Trash,” which offered a 60-day retention window. The extended timeframe gave him ample opportunity to restore them. This case proves how the cloud’s longer grace period can salvage your memories when local bins have already done their final purge.
3. A Corporate Event Photographer’s Data Crisis
Daniel, a corporate event photographer, used a high-end Android phone for quick snapshots. Mistakenly believing he had transferred photos to his laptop, he emptied his phone’s trash to free storage. Later, discovering the images never made it to his PC, he turned to Google Photos.
Because the app was installed and auto-sync was active, the images lingered in Google’s cloud trash. With only five days left before permanent removal, he managed to restore them just in time for his client’s marketing campaign. Without Google Photos as a backup solution, the entire day’s work might have vanished.
These stories illustrate that while it’s easy to panic when beloved photos vanish, the phone’s trash or Google Photos often provides a safety net. Each scenario underscores the importance of speed, knowledge of your device’s features, and an understanding of how local and cloud-based trash folders complement each other. The difference between success and sorrow often boils down to a few taps in the right place.
Expert Tips And Final Thoughts On Recovering Photos From The Trash
Mastering the art of recovering photos from the trash requires more than simple instructions. It calls for proactive habits and a deeper awareness of how data moves between your device and the cloud. As digital storage becomes more integrated, experts consistently recommend multi-layered strategies to prevent irreversible loss. Below, we present final insights collected from photographers, IT professionals, and cloud specialists, ensuring your images remain well within reach.
1. Enable Cloud Sync Whenever Possible
“Sync is your friend,” says Helena Flores, a digital archivist. Services like Google Photos or iCloud not only guard you against accidental deletions but also protect your library if your phone is lost or damaged. With cloud backup, any slip-up in local trash management can be mitigated by an easy retrieval from your online account.
2. Don’t Delay Recovery
Time is critical. Each day that passes pushes you closer to automatic deletion. If your phone sets a 30-day limit and Google Photos grants you 60 days, you have ample but finite windows. Check frequently, especially after traveling, big family events, or professional gigs.
3. Organize Albums And Folders
Well-structured album management reduces unintentional purges. “Sorting photos into albums as soon as possible helps you track important sets,” suggests a leading event photographer. Mistakenly discarding a mislabeled album is more common than you think, so clarity in naming prevents confusion.
4. Avoid Manual Trash Emptying—Until Necessary
Manually clearing your trash might free storage, but it also eliminates second chances. Many experts advise letting the system’s timeline handle the final removal. If you must remove items, double-check each photo or video to confirm it’s truly unneeded.
5. Embrace Additional Backup Solutions
While phone recycle bins and Google Photos are powerful, you can bolster security by using external hard drives or alternative cloud platforms. A good rule of thumb is the “3-2-1” backup method: keep three copies of your data, stored in two different media types, with at least one offsite or in the cloud.
6. Invest In Recovery Software As A Last Resort
If both your phone’s trash and Google Photos fail—maybe the items were purged for good—third-party recovery apps can sometimes restore images from the device’s internal memory. Tools like Disk Drill, EaseUS, or Dr.Fone might succeed, but they’re less reliable once the trash period expires and data is overwritten. Use them only when simpler avenues have closed.
Ultimately, the best defense against accidental data loss is vigilance and layering. “If you trust just one backup or one trash folder, you’re taking a risk,” warns Alex Johnson, a mobile data expert. By combining your phone’s built-in recycle bin, Google Photos backup, and mindful management, you drastically minimize the chance of heartbreak. So, next time you’re worried about a lost shot, remember these tips. A few strategic taps can be the difference between anguish and relief.
FAQ: Common Questions About Recovering Photos From The Trash
Q1: Will My Phone’s Trash Bin And Google Photos Trash Conflict With Each Other?
Not typically. They operate independently. If you delete an image from your phone, it usually stays in the phone’s trash. If the image was also synced to Google Photos, it resides in Google’s trash as well. This dual-layer approach often aids recovery efforts.
Q2: Can I Recover Photos After My Phone’s Trash Is Emptied?
If you cleared your phone’s trash but have Google Photos syncing enabled, the deleted images might still be in Google Photos’ trash. You have up to 60 days from the initial deletion to restore them, provided they existed in your cloud backup.
Q3: Do Restored Photos Retain Their Original Quality?
Yes, in most cases. If you recover images before the phone’s or Google’s final purge, you’ll likely get them back in their full resolution. However, if you used a third-party recovery tool after overwriting occurred, some images may appear corrupted or partially degraded.
Q4: What Happens If Google Photos Storage Is Full?
If you run out of Google storage, newly added photos or backups might be paused. You may have to upgrade your plan or clear unused content. Beware that manually emptying your Google Photos trash to free space can permanently delete images, removing any chance of recovery.
Q5: How Do I Recover Photos That Weren’t Backed Up To Google Photos Or The Phone’s Trash?
Your best bet is third-party recovery tools. Install them on a computer, connect your phone, and run a deep scan. While these methods aren’t guaranteed—especially if the data was heavily overwritten—they sometimes succeed where built-in trash methods fail.
RELATED TOPICS
• phone photo backup solutions
• cloud storage for images
• gallery app alternatives
• recovering deleted videos
• best android data recovery software

